Organising your Emails with Outlook 2013
Over time, you are going to accumulate a lot of emails – especially in a work environment and you won’t want to keep them all in your inbox forever, you’ll never find anything. That’s why Microsoft have a handy way of organising your emails with Outlook 2013. You can create folders and easily drag and drop them into your new filing system.
Organise Your Emails in Outlook 2013 – Create a folder
Create folders to file your email
Right Click
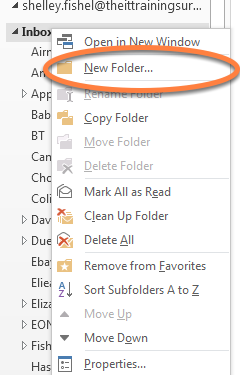
Figure 75- create a new folder
Left click on New Folder
The Folder Ribbon

Figure 76- the Folder Ribbon
Click on the Folder Ribbon (1)
Click New Folder (2)
Drag and drop to file email to organise your emails in Outlook 2013
A simple way to move one or more email from your inbox to a folder, is to drag the email(s) and drop them on the folder you want to put them in.
Drag one email
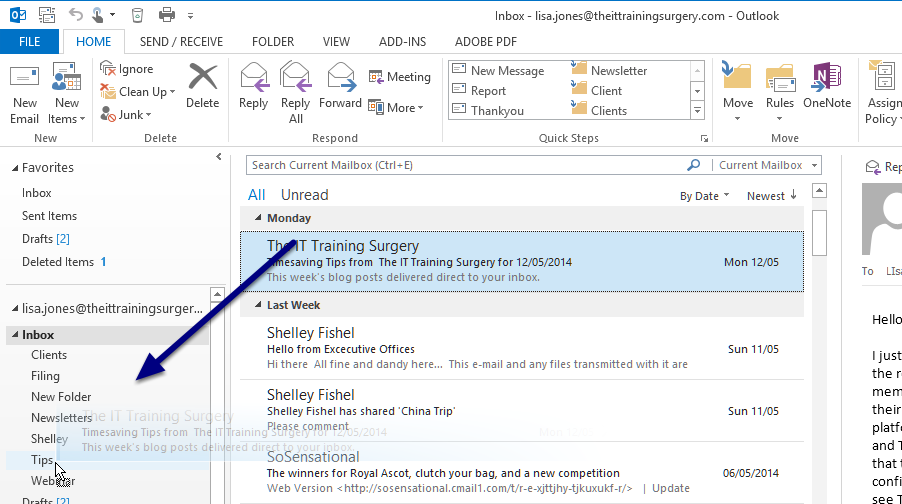
Figure 77- drag to file
1. Click on the email you wish to move
2. Drag keeping the left mouse button down
3. Drop it onto the folder you wish to place it in.
Drag and drop several emails
Figure 78- drag multiple to file
Select the emails to move:
To select emails that are next to each other in the inbox click on the first one then hold the shift key and click on the last one.
If the emails are not next to each other – hold down the Control Key whilst clicking on each one.
Once you have them all selected, drag them to the folder where you want them to be filed.
The move button – quickly organise your emails with Outlook 2013
When filing email dragging and dropping is fairly quick and easy except in the following scenario. You need to move a whole lot of email and you select them all. Then you drag them over to the folder list to drop them into your chosen folder. So far so good. Well now, if you are anything like me you probably have loads of folders and when dragging a bunch of email it is so easy to drop them in the wrong place! So the Move button comes to the rescue!
The move button

Figure 79- the Move button
Move email
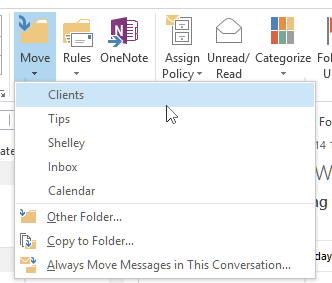
Figure 80- click to move
1. Select the email(s) you want to move
2. Click the Move Button
3. The Move button will remember the last 10 folders you moved email to
4. Click on the folder to use
Other folder

Figure 81- move to a folder not on the list
If the folder you want to move email to is not in the list click the Other Folder shortcut on the list
Select the folder you want to move to
Click OK
Create a new folder to move to

Figure 82- create a new folder on the fly
If this is the first time you are filing email for a particular client or category, you need to create the folder on the fly.
1. Click on Other Folder
2. In the box click New
3. Name the new folder
4. Click OK
5. Click OK again
6. The email will be filed
Always move messages in this conversation
When messages are arranged as a conversation, meaning that the replies are grouped with the original, you can decide to have all messages in the conversation moved automatically. This will move all the current messages in the conversation and all future ones too.
So there you have it, by following the steps above you can easily go about organising your emails with Outlook 2013 by creating folders and sub folders and by dragging and dropping your emails into those folders. Quick, easy and painless!
Find more Outlook 2013 tips in Shelley Fishel’s eBook Outlook 2013 at bookboon.com.
We hope you enjoyed this article. Please also check out other Outlook blog articles such as “How to Customise Outlook 2013 Email Options” or “Get Started with Email on Outlook 2013“.
If you also work with other Microsoft Office 2013 programs, check out out blog posts “Best Excel 2013 tricks: Naming a Cell” and “Best Word 2013 tricks: Understanding the review tab“.