How to use masters in Power Point 2013

What are masters?
Slide masters exist to help you create great looking presentations with minimal effort. They sit behind the presentation and govern the way it looks and behaves. You can add a logo, customise the background, and create your own colours and font combinations for the whole presentation. This means that whenever you add new slides to the presentation the formatting is taken care of and you can focus on the content.
If you want to change the look of the whole presentation, you can simply edit the Slide Master and hey presto everything will change.
You can create custom layouts in the Slide Master – just in case the layouts that exist are not sufficient for your purposes. It is best to edit the Slide Master before you start to create the presentation. That way the look and feel is taken care of before you start.
Another reason for editing the Slide Master before you begin with the content is that any edits you make to a layout after you have built the slides, will have to be applied in retrospect, which means that you have to go back and reapply those layouts to the affected slides.
There are several masters:
Slide Master – this master is for the presentation itself.
Handout Master – this master determines how the handouts will look.
Notes Master – this master controls how any notes will look.
View the Slide Master
To get to the Slide Master
Click the View Ribbon
Then click on the Slide Master Icon

Figure 55- Master view icons
[bookboon-book id=”47d3b6ba-0607-4cc3-93fc-a34800d2f45c” title=”Check out the PowerPoint 2013 guide” button=”Read eBook”]
The Slide Master
The Slide Master view looks a little different. The top slide in the thumbnail list is the Slide Master and controls the presentation. Each Slide Master has a number of related layouts – you probably won’t use all of them. You may modify some and delete others to keep consistency.
When you make changes to the Slide Master, anyone else working on your presentation can use the new formatting in Normal View, and they can’t accidentally change it.
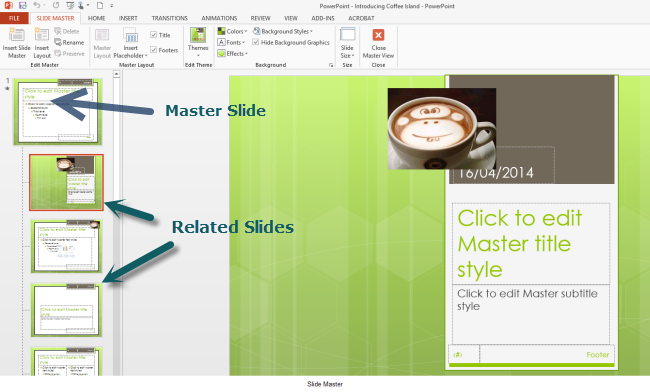
Figure 56- the Slide Master
Themes
What is a theme
A theme is a palette of colours, fonts, and special effects (like shadows, reflections, 3-D effects, and more) that complement one another. You can see the Design Themes on the Design Ribbon
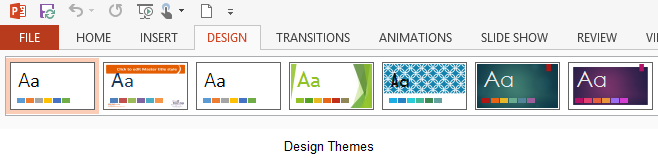
Figure 57- Themes Gallery
In the image above is a selection of Design Themes. Each Theme has a Master and a related set of slides. They have been created by skilled designers at Microsoft and the designer will have decided which layouts are included and how they should look.
Even the blank presentation has a Theme – it is the Office theme and can be reapplied to a presentation if you have gone and made too many changes and want to start again.
Layouts
Layouts control how the content is added to a slide. There are different layouts for different jobs. For example if you want to compare two images side by side you could use the comparison layout.
Each theme has a selection of layouts – you can add, delete or modify the layouts.
Applying a Slide Master
When we talk about Applying a Slide Master, we mean changing the design – the look and feel.
As each theme has its own set of Slide Masters, simply by applying a different theme, we are changing the Slide Master associated with the presentation.
To change the design:
Click on the Design Ribbon
Select the Design Theme you want to use
Here is my presentation with the Facet theme applied. To the right of the Themes are variants, these are different sets of colours to apply to your chosen Theme.
Figure 58 – apply a Design Theme
To see the Slide Master for this theme:
Click the View Ribbon
Click on Slide Master
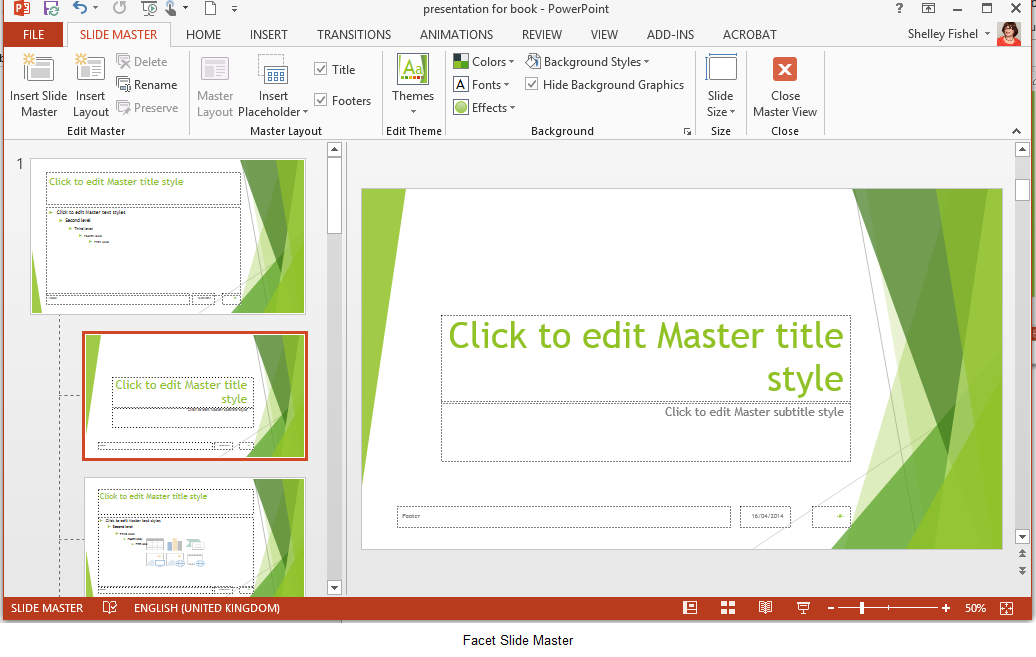
Figure 59- View the Master
The top layout in the thumbnail list is the main Slide Master and is used by all the slides in the presentation. The second of the related layouts is the title slide layout and is used by the first slide in the presentation. The third slide down is the standard layout which is used by slides 2-8 in the presentation.
We hope you found this article helpful and learned something new. If you would like to improve your knowledge on PowerPoint 2013, check out the “PowerPoint 2013” guide. Don’t forget to share it with your friends or colleagues if you think they could benefit from this article. You might also want to check out other PowerPoint blogs such as “How to use SmartArt graphics in PowerPoint 2013” or “3 Simple Ways to Make a Creative Design in PowerPoint“.
[bookboon-recommendations id=”47d3b6ba-0607-4cc3-93fc-a34800d2f45c” title=”You might also find these books interesting…”]