How to manipulate illustrations in Excel
In this article we will show you how to add pictures to your Excel data sheets to add some illustrations to your work. You have the choice to insert a photo from a file or an online photo and we will also explain how to resize the image so it fits with your data. Read on to learn how to make your presentations more colourful.
Pictures in Excel
In Excel, as in the other Microsoft Office programs, you can add pictures to make your work more interesting. You might want to add a logo or a piece of Smart Art to illustrate a point. Familiar tools from other applications are available in Excel 2013.
Insert a picture from a file on your computer

Figure 55- insert picture from file
- Place the cursor where you want the picture to appear
- Click on the Insert Ribbon
- Click on Pictures
- Navigate to the folder where your picture is stored (mine is in a folder called Coffee in my Pictures Library)
- Click Insert
Insert an online Picture
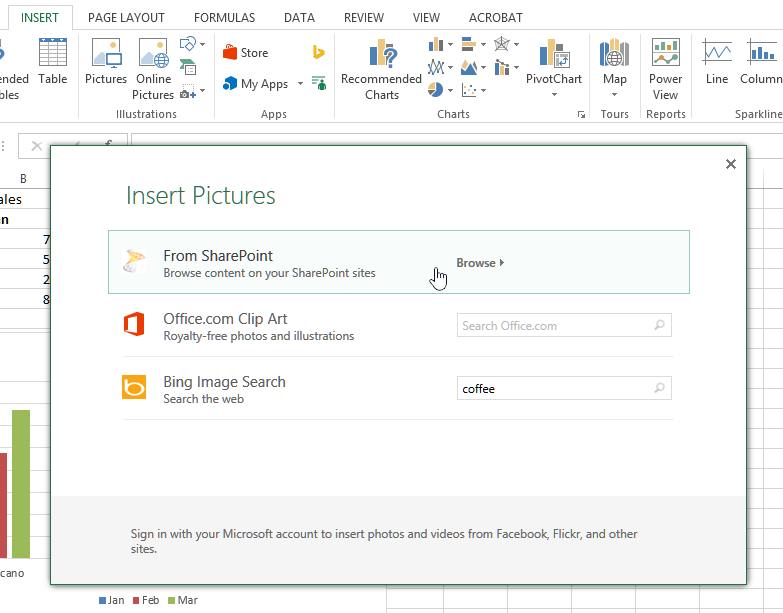
Figure 56- add an online picture
If you don’t have a picture on your computer you can go online for more options.
- From SharePoint – if you are using SharePoint in your organization, you may have pictures stored there and you can search for them by clicking Browse
- com Clip Art – if you are looking for some Clip Art, go online to Office.com by typing a keyword and then clicking the magnifying glass
- Bing Image Search – type your keyword here and click on the Magnifying Glass to search

Figure 57- images from Bing
Bing will offer you a selection of images and a warning about copyright. Make sure you comply!
Click on the image you want to use and click Insert.
The picture is downloaded and inserted into your document. You may well need to resize it too!
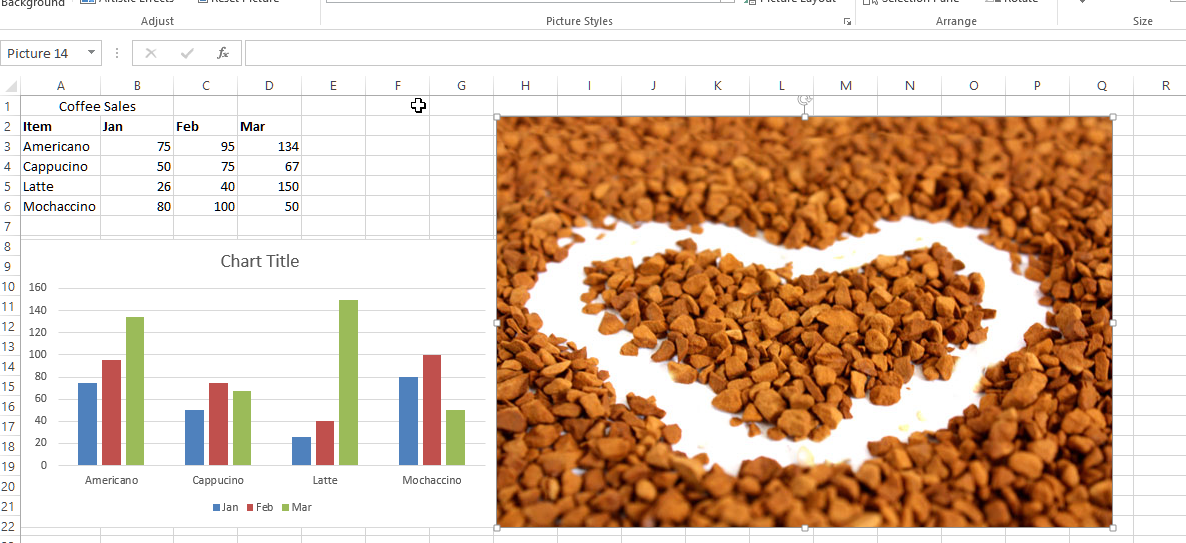
Figure 58- image added
Resize the picture – dragging
Pictures will pop into your spreadsheet and often be far too large. Use the following methods to resize them.
Reside the picture – dragging

Figure 59 – click and drag on the diagonal to keep proportion
Grab the corner and when you see the diagonal white arrow drag the cursor down and to the right – keeping the ratio of the long and short edges proportional.
Resize the picture using the Ribbon
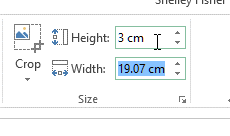
Figure 60- set an actual size on the Ribbon
- Click on the picture to select it
- Click into the height or width box in the Size Group on the Picture Tools Format Ribbon
- Type the size you want the picture to be
- Excel will automatically change the other value to keep the picture proportional
Modify a picture
Excel 2013, like the other Microsoft Office applications, offers many ways to modify and enhance your pictures. Use the Picture Tools Format Ribbon to make changes.
Picture Tools Format Ribbon

Figure 61- The picture tools Format Ribbon
Here you can add a picture style, a border, and picture effects such as shadow change the picture layout. You can also send images backwards and bring them forwards if you have several.
Crop an image to remove the parts you don’t need and adjust the size.
Add a style to a picture
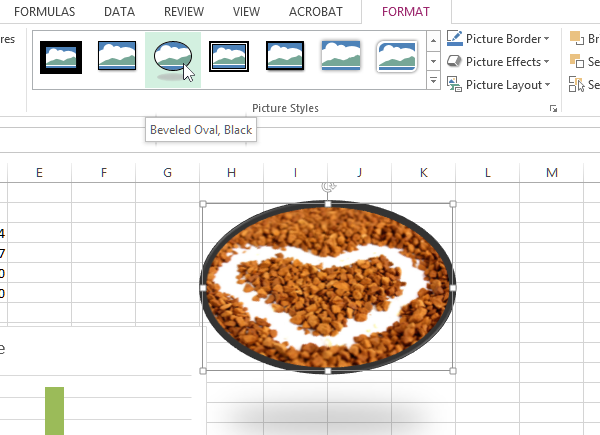
Figure 62- style your picture
Select the picture and then hover over the styles in the Picture Styles Gallery and see how your picture will look. When you find one that you like, click on it to apply.
Don’t forget to share it with your friends or colleagues if you think they could benefit from this article. You might also want to check out other Excel blogs such as “How to assign shortcuts in Excel 2013”, “Remarkable features of the quick access toolbar in Excel 2013” or “How to make Excel files compatible with older MS Office versions” and “How to use the IF Function in Excel“.