How to customize your PowerPoint presentation

PowerPoint is a very practical presentation tool. But no matter how many times you have worked with PowerPoint before, there are a few tips and tricks that can help customize your presentation. The first part of this article will explain how to customize presentation options and views and in the second part we will show you how to navigate by using presentation views. Please read on..
Customize presentation options and views
Changing page setup options
Presentations are created mainly to project either on a projector or more and more frequently to a plasma or TV screen. There are times when a presentation can be created for delivery in different formats.
| · On-screen show (4:3) · Letter Paper (8.5 x 11 in) · Ledger Paper (11 x 17 in) · A3 Paper (297 x 420 mm) · A4 Paper (210 x 297 mm) · B4 (ISO) Paper (250 x 353 mm) · B5 (ISO) Paper (176 x 250 mm) · 35mm Slides · Overhead · Banner · On-screen Show (16:9) · On-screen Show (16:10) · Widescreen · Custom | 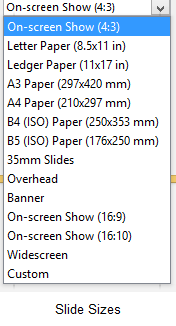 |
To select a slide size other than the standard one:
- In Slide Master View
- Click on Slide Size
- Select from one of the two options
- For more choices, click Custom
- Select one of the options
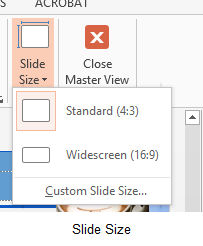 Figure 89- standard or widescreen | 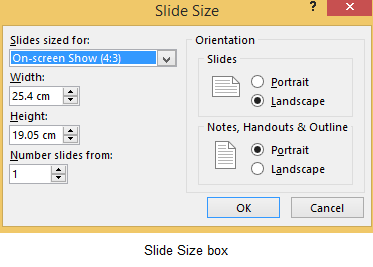 Figure 90 – other options If you change the orientation to Portrait for the presentation it will apply to all the slides. |
Changing to view in color/grayscale
Why change to view the presentation in grayscale? You might want to print the presentation and to print in colour is more expensive than printing to greyscale, so you need to see what the presentation looks like in grayscale before you print.
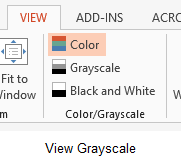
Figure 91- colour/grayscale options
On the View Ribbon, click on the option you want, Colour, Grayscale or Black and White.
Then from the Grayscale Ribbon select the option you want to see:
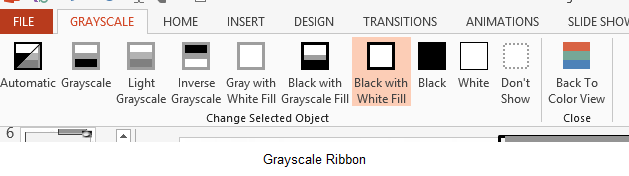
Figure 92- grayscale options
To get back to the colour view, click Back to Colour View.
Navigating using presentation views
There are several different views in PowerPoint as we saw earlier and you can navigate through the presentation in each in different ways.
In Normal View
- Click on the thumbnail of the slide you want to see
- Use the Vertical Scrollbar to move between slides
- Use the up and down arrow keys on the keyboard to move one slide backwards or forwards
In Slide Sorter View
- Click on the slide you want to select
- Use the arrow keys to move up, down, left and right
In Reading View
Use the next and back icons in the status bar to move back or forwards or use the menu which is accessed from the icon in the middle
 Figure 93- reading view Pick from the menu – you can use Go to Slide to pick the slide number |  Figure 94 – icons Back and Next icons move between slides. |
In Slide Show view
When presenting you can use the mouse or the arrows on the keyboard to move through the presentation one slide at a time.
You can also type the number of the slide you want to see and press Enter.
When you hover the mouse over the bottom left corner of the slide on display you will notice some faint icons, there is a back arrow and forward arrow which move you through one slide at a time.

Figure 95- slide show icons
Use the fourth icon along to show the slides in a presentation view of Slide Sorter View. This lays the slides on the screen and you can click on the one you want to see
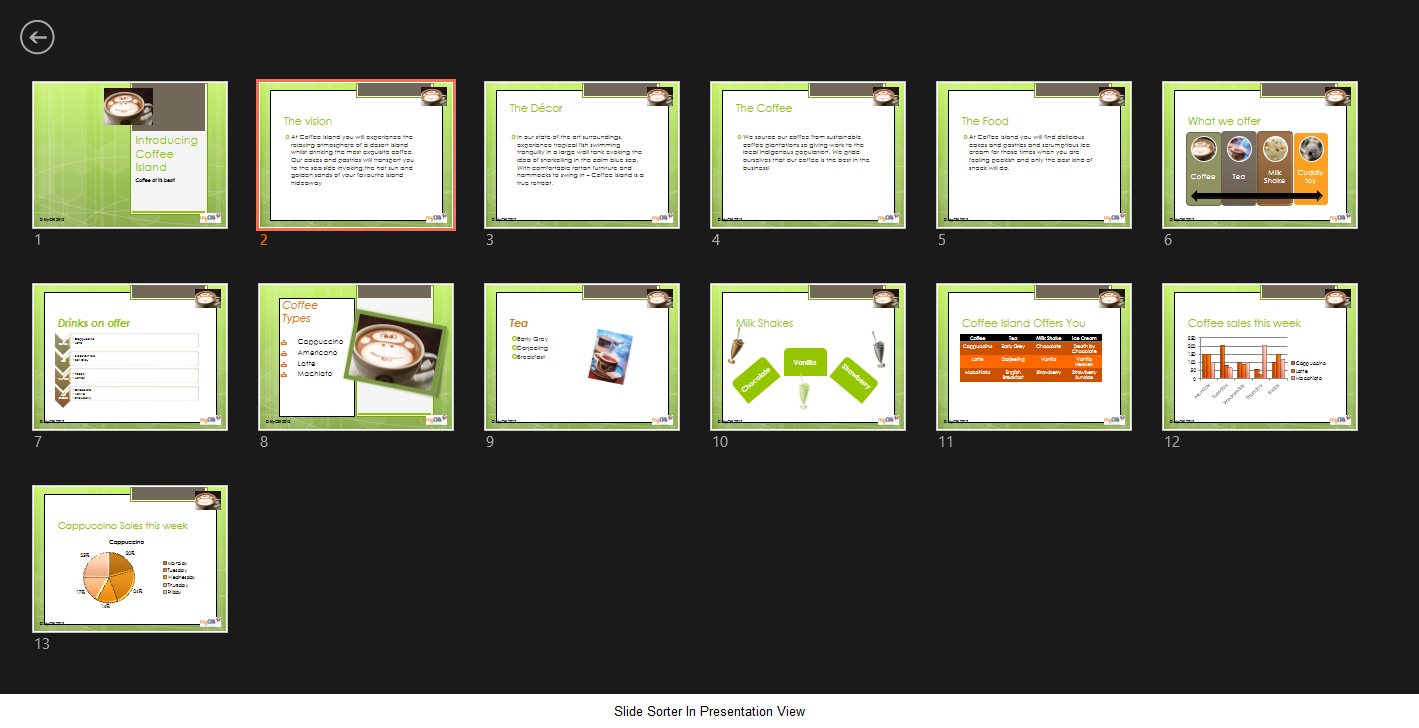
Figure 96- Slide Sorter in presentation view
Use the back arrow at the top left to get back to the slide you started from.
To end the slide show, press the Escape Key on the keyboard – this takes you back to PowerPoint in the edit mode which means that your audience will see the back end of your presentation.
You can also use the End Presentation option which is on the small ellipse icon on the bottom left of the slide when you hover the mouse.
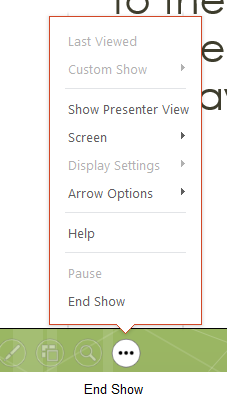
Figure 97- end show and stay in presentation mode
We hope you enjoyed this article!
PowerPoint 2013 has a lot more exciting features. All you have to do is to explore it. Aren’t you excited to discover and use these features such as how to track changes in PowerPoint 2013?
Good luck with your next presentation and don’t forget to have a look at the other blog articles for more tips:
- PowerPoint Presentations: 2 Ways to Make Them More Appealing
- 3 Simple Ways to Make a Creative Design in PowerPoint
- How to use SmartArt graphics in PowerPoint 2013
- How to use PowerPoint AND engage your audience
- How to present a PowerPoint presentation online
- How to use masters in Power Point 2013
- How to format text in PowerPoint
- How to use PowerPoint AND engage your audience