Outlook 2013: How to Use QuickSteps and Save Time

Create and Customize QuickSteps
QuickStep allows you to make repetitive tasks in a simple, easy and quick manner. Filing email, replying to a group, sending new email, etc. – these are some of the things you often do on a regular basis that are actually possible candidates to become a quickstep.
Creating new QuickSteps
QuickSteps are found on the Ribbon. There is an option there to create a new one on the QuickStep gallery. Click this option and follow the remaining steps.
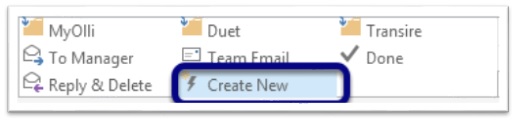
1. Click Create New.
2. Name your new QuickStep. (The example below uses the name as “Chocolates”.)
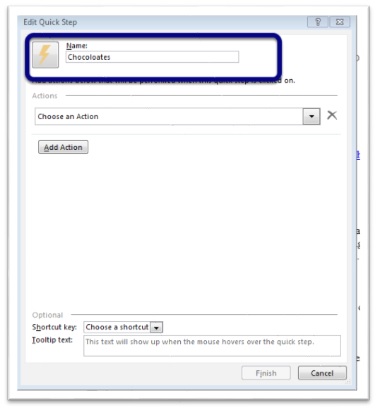
3. Select the action the new QuickStep will perform. You can choose on the dropdown list.
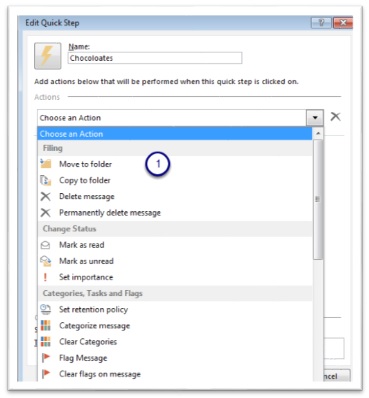
4. In this specific example, the “Move to Folder” option is selected. The target folder will be the “Chocolate” folder found on the list. See below.

5. You can also add any other actions (1), just like what is done in the image. A keyboard shortcut key may also be added (2) and some text to display when your mouse hovers over the QuickStep (3).
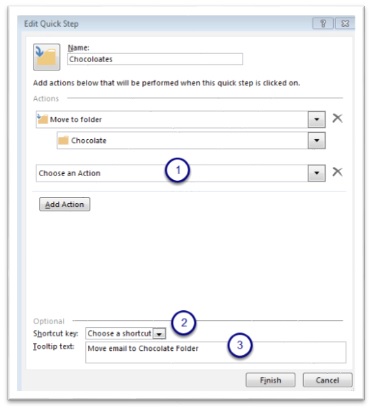
6. Click “Finish” and your QuickStep is ready to use.
[bookboon-book id=”0ccfb7e8-04f6-430a-a594-a34800d555dc” title=”This article is based on the following eBook” language=”en”]
How to use the Quicksteps
Using the QuickStep is really easy. Simply select the email you wish to file and click on the QuickStep gallery. Presto! It is moved!
Other QuickSteps
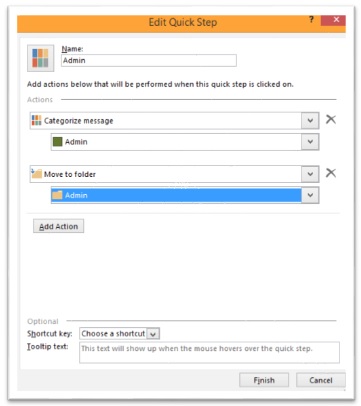
There are other possible QuickSteps that can be made to minimize the steps in doing tasks. One of these is “Categorize and Move”, wherein we categorize email first before moving them into the desired folder, as shown below.
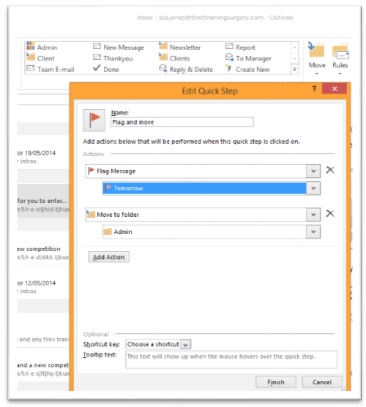
Another one is the “Flag and Move” option. In this QuickStep, you will be able to flag an email for follow up before moving it to the desired folder. Refer to the image below.
Same procedure as the first one (Creating New QuickSteps) are done to make these other QuickSteps possible. The only difference is the action chosen.
Creating a new email and forwarding emails using QuickStep
There is always this someone whom you send messages to more often. Sometimes, it can be tiresome to start a new email all over again and add the address every time. This is where QuickStep may be of help. With just one click, you will be able to set up new email to a particular contact.
Same procedure will be done. On the QuickStep gallery, choose “Create New”. In this case, choose the action to “New Message”. Fill out all the necessary information, click “Finish”, and your QuickStep is ready!
This step is also true in forwarding an email. Instead of choosing “New Message” in the actions dropdown, choose “Forward”. Do not forget to click “Finish” when you are done!
Setting up a new meeting with QuickSteps
Setting up a meeting with a particular person often? Why not use the QuickStep so it would be easy to set it up on your Outlook calendar? How to do that? Just follow these steps.
- Click “Create New” from the QuickSteps gallery.
- Type a name for the QuickStep.
- Choose an action – in this case, “New Meeting”.
- Type the email address of the person to meet with (or select from those suggested).
- Click Finish.
There are other Meeting QuickSteps to choose from. Refer to the following.
Reply with Meeting:
- Create an appointment with attachment
- Create appointment with text of email
Standard response and add to calendar
Have you ever think of doing two steps in Outlook all at once? Let’s say setting up a standard response and creating an appointent in the calendar. Do you think it’s possible? In QuickSteps, YES!
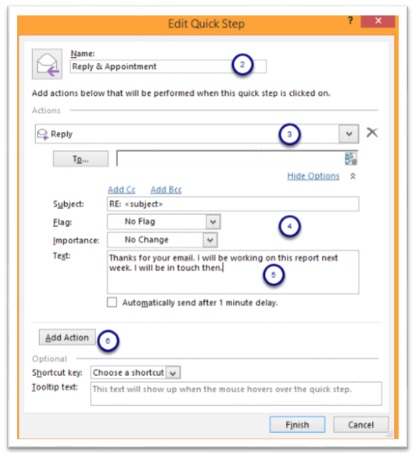
The image above summarizes the first half of the procedure.
- Click “Create New” from QuickStep gallery.
- Name the QuickStep.
- On the Actions dropdown, select “Reply” to create a reply to an email.
- You may add flag or set importance.
- Type the body of the message (standard text).
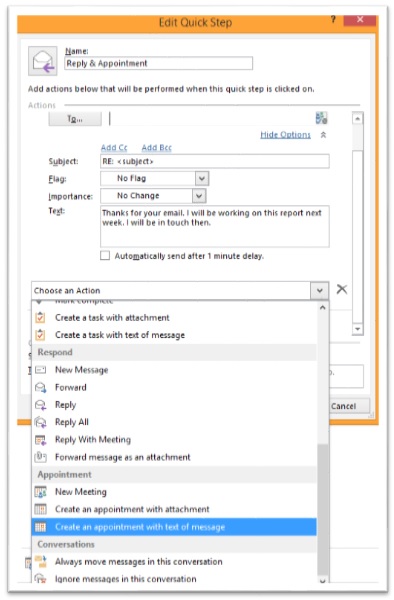
- Click Add Action to select the second action.
- Select “Create an appointment with the text of the message” – this will create an appointment in your calendar with the message text included, as shown below.
- Then, click “Finish” to finalize.
Using the standard response and add to calendar via QuickStep
Once you clicked on the new QuickStep, two dialog boxes will appear.
- Outlook shows the standard reply (ready for adding further information before clicking send); and
- a box to create an appointment with the text of the message included.

That is how amazing QuickSteps can be. Be ready to create one now and enjoy using it!
Here is another blog article that might be interesting for you:
“Keeping Track of Incoming and Outgoing Messages in Outlook”