PowerPoint Presentations: 2 Ways to Make Them More Appealing

PowerPoint presentations are the most common resort of people who want to express all his thoughts in either small or huge audience. It is some sort of a guide that hits two birds at the same time – the speaker and the listener. In this modern era, when a speaker comes in front, it is very usual that he has his presentation with him. Through the help of the presentation, both of the speaker and the audience are guided with what they are talking about.
A PowerPoint presentation will be boring without the transitions and animations. These two, if used properly, make it more dramatic and thrilling. They give the speaker the control to make the presentation be filled with some sort of surprises and appeal.
And don’t forget to track changes in PowerPoint 2013 for when you want to go back to a previous version during your preparations.
To clear things up, transition is the term used for the creative movement between slides. On the other hand, animations in PowerPoint refer to the movement between objects found on each slide, like text, pictures, and other illustrations.
Here are the two ways on making your presentation more enticing:
1. Applying Transition Between Slides
There are several transition effects from PowerPoint that you can choose from. These control how slides appear during the slide show. They can be customized as well in terms of their duration and direction.
Inserting transitions between slides:

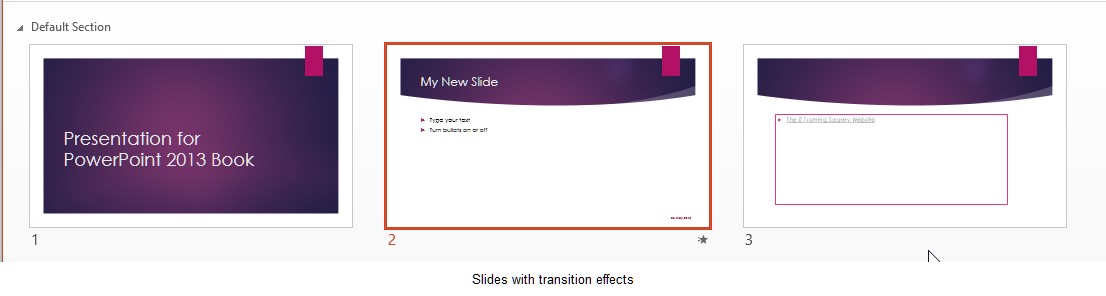
Transition effects:
They can be found on the Transitions Ribbon shown above. It is best used when you are in a Slide Sorter View. In this way, you can select as many slides as you want and apply transitions to them. Transition timings is also shown in here.
- Switch to Slide Sorter View
- Click the Transitions Ribbon
- Choose the transition style that you want to use (A quick preview of the transition effect will be shown on the slide you have selected.)
- To apply the chosen transition to all slides, click “Apply to All” (Slides that have a transition effect applied is marked with a small star in the bottom right hand corner in Slide Sorter view.)
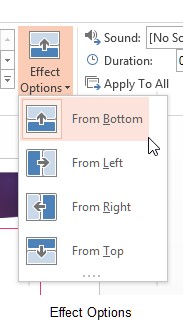
Modifying transition effect options:
Depending on the transition style you choose, directions of these effects can also be modified.
- Just click the Effect Options icon and make your choice.
Other Features:
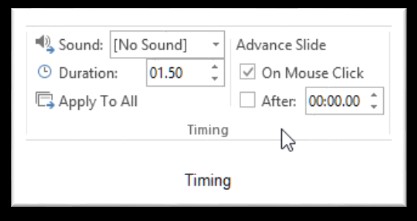
Adding Sound and Setting Transition Timing
- For the SOUND – Just click the drop down arrow next to Sound and select the sound to add.

- For TIMING options – Click on the slide you want to change. Then, go to Transitions Ribbon and edit the Duration option. You can also advance in a slide show after a specific time, just edit the “After” tick box. If you want to apply such setting onto the whole presentation, click the “Apply to all” button.
2. Applying Animations on Slide Contents
Transitions are for slides, animations are for the elements on the slides. This option controls how each elements arrive on the slide. This is best used in a Normal View.
Applying animations to shapes
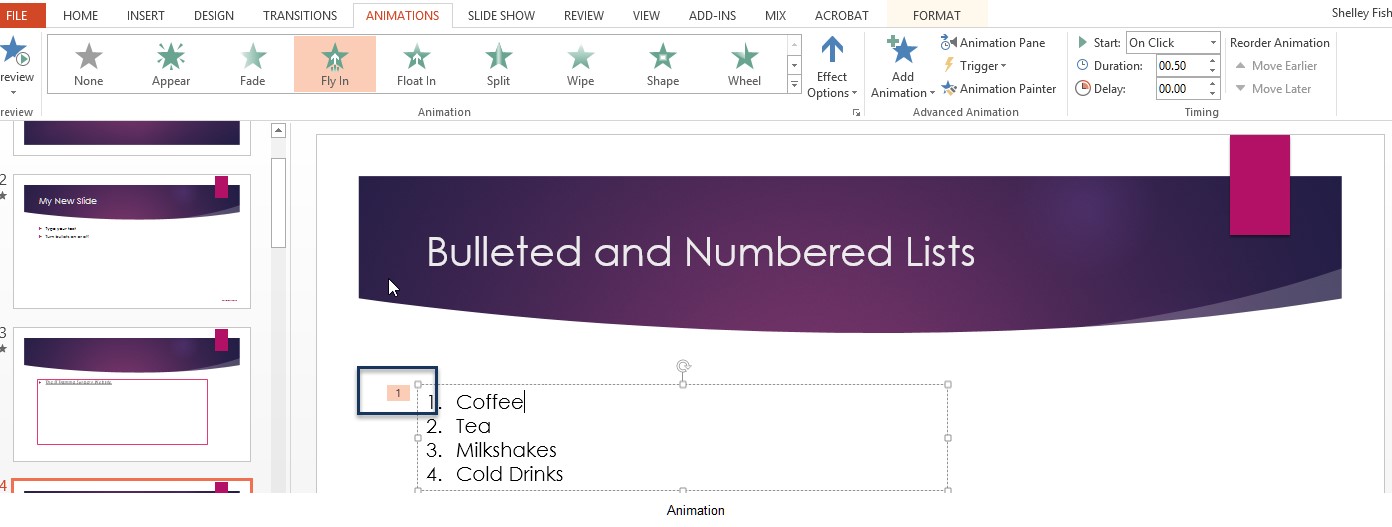
- Select the text or object to animate
- Click the Animation Ribbon
- Choose the Animation style you want to apply (A preview of the animation is played and a small number appears on the object to show the order of animations.)
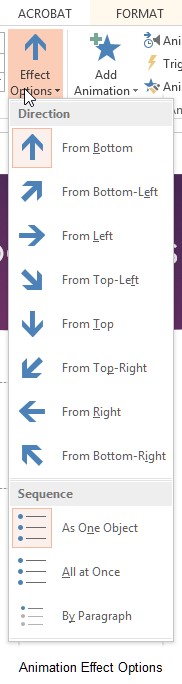
When adding animation in a list, there are two categories that can be changed:
- Direction (from bottom, from bottom left, from left, from top left, from top-right, from right, and from bottom-right)
- Sequence (As one Object – all arrive together, All at once – all arrive together and By Paragraph – one line at a time)
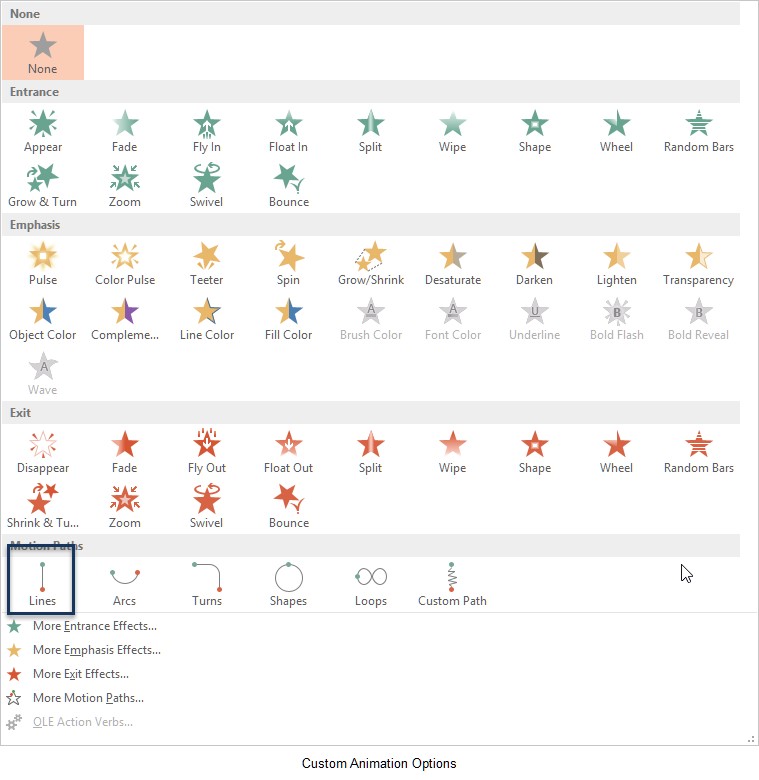
Adding paths to animations:
This specialized animation option makes the path more customized or personalized based on the need of the presentation.
- Select the image you want to animate
- Click on the drop down next to the animation gallery
- Select from the Motion Paths group
- Click on Effect Options and select the direction you want to use (The option below chose “Lines”.)
Modifying animation options:
In the Animation Ribbon, you can set the duration of an animation or trigger it using the relevant icon.
Reordering animations:
In applying animations on the elements on the slide, PowerPoint automatically numbers them and plays them based on that specific order. You can change it according to your desired sequence. Using the Animation Pane will be of help.
Using the Animation Pane:
- Click the Animation Pane Icon on the Animation Ribbon
- The Animation Pane will open on the right of the screen
- You can move the objects up or down in the order by clicking the move buttons at the top of the Animation Pane

- You can also set how the animation will start and control the timing.

Removing Animation:
- In Normal View show the slide from which you want to remove the animation
- Click Animations
- Click on None
Presentations can be customized in such a way that not all contents are shown all at once plainly. You can spice it up by making some transitions and animations. In this way, your presentation will not be boring and the audience will be focused only on topics posted while you are discussing.
We hope you enjoyed this article!
PowerPoint 2013 has a lot more exciting features. All you have to do is to explore it. Aren’t you excited to discover and use these features?
Good luck with your next presentation and don’t forget to have a look at the other blog articles for more tips: