8 Easy Steps on Tracking Changes in PowerPoint 2013
In using Microsoft Word, tracking changes is so easy. You will just have to click the Review Ribbon, and look for the “Track Changes” option. There, you can choose between tracking the changes or lock the tracking – an option to discourage others to turn off tracking changes using a password. In short, the system really has the specific functionality to make the tracking possible.
The story changes in Microsoft PowerPoint. It doesn’t have that specific functionality for tracking changes done on a presentation. However, it is still possible for other people to make changes on a copy of your presentation and it’s up to you whether to accept or reject the changes. How is that possible? Look at the following eight easy steps.
Before anything else, the first thing that you have to do is to save a local copy of your presentation on your computer. Do not forget to ask them to save the presentation using different file name after they have done the changes.
Now, how to track changes using these presentations – the original and the modified one?
Here are eight easy steps:
- Open the original copy of your presentation.
- Click on the Review Ribbon.
- Click the “Compare” option.
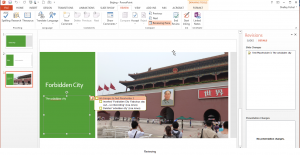
- Select the copy you want your presentation to compare to – the one you asked your colleague to change and save into a different file name. After this step, PowerPoint will change and show the Review Pane on the right. Any notes or changes will appear both in the task pane and on the slide, as shown below.
Tick the change you want to accept or reject based on what you want to do with your presentation. You may do so by clicking on the “Accept Changes” or “Reject Changes” option. You can move on to the next revision or revisit the previous one by clicking on the “Next” or “Previous” icons. When you are done, click on the “End Review” button and a dialog box will appear. PowerPoint will check if you are really finished with the revision. Just make sure that all changes are done, either accepted or rejected, before you click the “Yes” option. Any unapplied changes will be discarded once you click yes – as seen in the image below.
Click “Yes” and all the updates will be confirmed. After this, your presentation will be updated.
Microsoft really has the features we need to make our tasks a lot easier. Imagine checking on each slide’s differences one by one? It is great that Review Ribbon has this “comparing/ tracking feature” which makes our effort on matching presentations lesser. Without this option, one really has to exert lots of time and energy in looking for the changes applied in a certain presentation.
Good luck with your next presentation and don’t forget to have a look at the other blog articles for more tips:


