How to present a PowerPoint presentation online

Did you know that you can use PowerPoint 2013 for online presentations to show to a remote audience? Read this article to find out how to prepare an online presentation.
With the advent of PowerPoint 2007 the ability to present your slideshow online to a remote audience was introduced. It has been enhanced and you can now choose from two options.
- Present online using Lync
- Present online using Office Presentation Service – a free service
It works by allowing your audience to be wherever they need to be – in their office, at their home pc, in a meeting room in a different city or even country. So long as you have internet access you will be able to present your slide show and they will be able to see and hear you.
Rehearsing timing
Before you run the slide show live it is wise to check that the timings work and you will not overrun your time slot or finish way too early! This is where Rehearse Timings comes in to its own. You can rehearse the timings for each slide and record them. Then when you run the slide show you can keep the timings and let PowerPoint take care of advancing the slides for you or you can decide to keep the timings but not use them when presenting.
Rehearse timing
Click on Rehearse Timings to enter the Rehearse Timings Screen.
Figure 120 – rehearse timings
You will now see your Slide Show as if you were presenting it. At the top left of the screen is a timer. The time starts to record as you stay on a slide and it will reset to 0 when you move to the next slide.
Figure 121- record timings
The arrow on the far left will advance to the next slide, the pause button will pause the recording. The counter in the middle shows the time on the current slide and the counter at the far right is the cumulative time for the whole slide show. The undo button also pauses the recording.
Once you get to the end you will be asked if you want to keep the timings. If you do then the timing for each slide is stored with the slide. You can choose whether to use the timings or not when presenting the Slide Show.
Figure 122- keep timings?
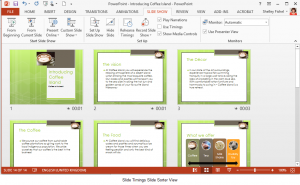
Figure 123- see timings in slide sorter view
In Slide Sorter View you can see the timings underneath each slide – the number of seconds is displayed.
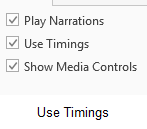
Figure 124- use timings or not
Clear timings
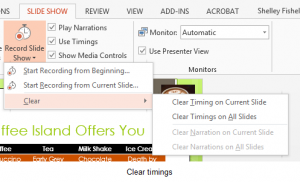
If you don’t want to keep the timings, you need to clear them.
- Click Record Slide Show
- Click Clear
- Click Clear timings from current slide or all slides
Figure 125- remove timings
Record slide show
Recording a slide show can be useful if you want to play it back on a website or send it to someone else so that they can watch and listen to it as if they were there.
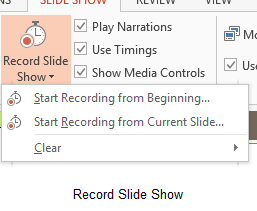
Click the Record Slide Show icon and select whether to record from the current slide or from the beginning.
Figure 126- record the slide show
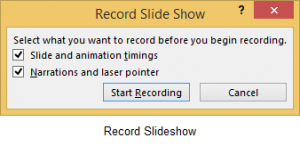
Now select what to record.
Figure 127- choose whether to record narration and animation
Click Start Recording
The Slide Show now starts with the time recorder just like when rehearsing the Show. However the added extra here is if you ticked Narrations and Laser Pointer these will be recorded as well.
One you have finished the recording you will see an icon on each slide showing that narration was recorded for that slide.
Figure 128 – Narration icon
Click on the icon and you are shown playback options
Figure 129- Narration Playback
The recording is recorded and when you play back the Slide Show the Narration plays automatically.
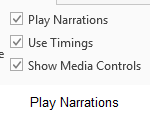
Play narrations
You can choose whether to play the Narration or not by checking or unchecking the Narrations box.
Figure 130 – choose whether to play Narrations
We hope you found this article helpful and learned something new. Don’t forget to share it with your friends or colleagues if you think they could benefit from this article. You might also want to check out other PowerPoint blogs such as “How to customize your PowerPoint presentation”, “3 Simple Ways to Make a Creative Design in PowerPoint” or “How to use masters in Power Point 2013“


